
How do we create a hierarchal structures in our model? One approach is with the use of block definition diagrams! These diagrams are great as they are used at any level of system decomposition. Let’s try to do this with our Security System model, but first some definitions.
Hierarchal Structures and Levels
The different hierarchal levels of decomposition are System, Subsystem, Component and Part.
System
A system is commonly described as the integration of subsystem components and or part in the pursuit to achieve a common goal or Mission.
Subsystem
A subsystem is an integrated set of components or parts which perform a separate function.
Component
A component is a system element that is comprised of multiple parts that can only be identified as a single item.
Part
A part is the lowest hierarchy level of a system that supports or satisfies the functionality of a component.
Modeling Hierarchal Structures
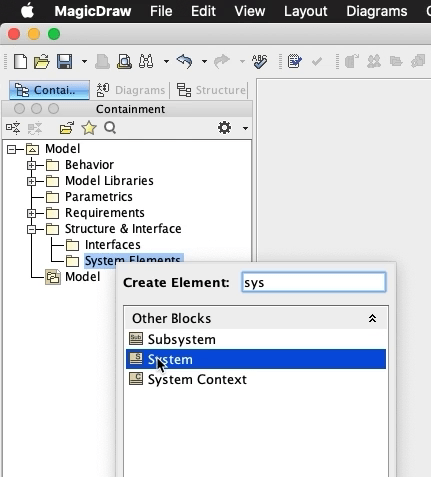
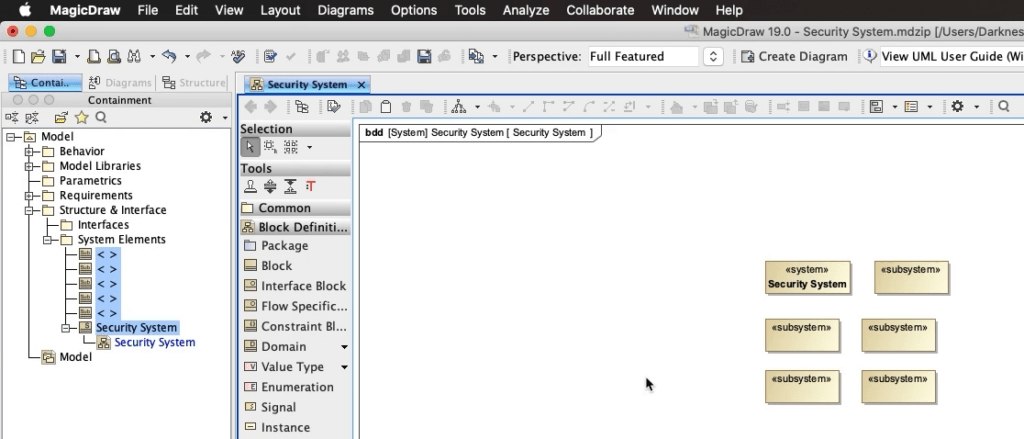
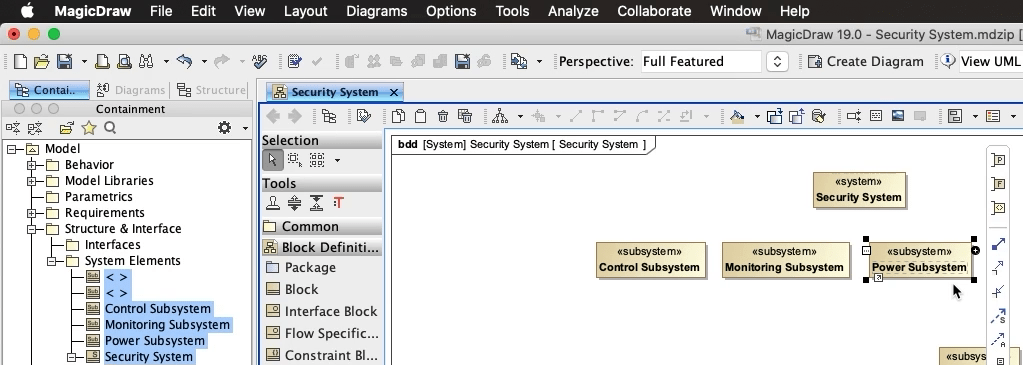
For our Security System, we will create our system blocks in the ‘System Elements’ package under ‘Structure & Interface’.
Let’s right click on our ‘System Elements’ package, ‘Create Element’ and search for ‘System’.
We will select the ‘System’ block. And name it ‘Security System’.
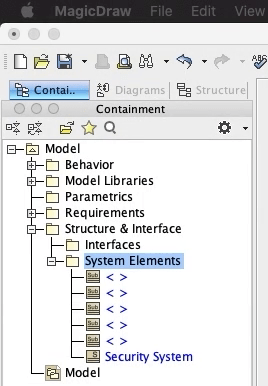
Now our Security System will have a variety of subsystems. We can create these the same way that we created our ‘Security System’ block.
Let’s create 5 subsystem blocks.
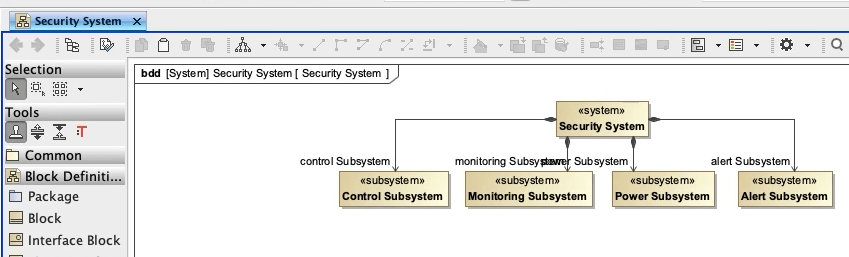
Let’s help our Stakeholders understand what our Security System decomposition looks like.
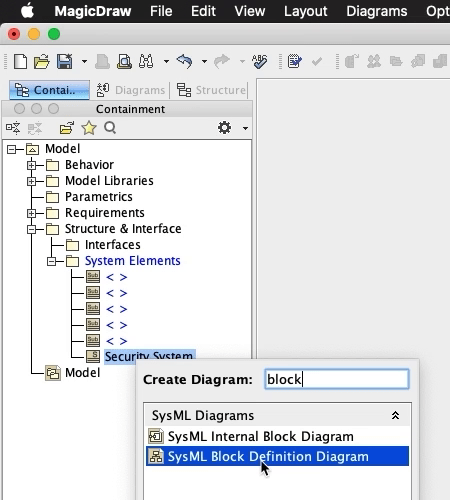
We will do this by creating a Block Definition Diagram. This diagram details the relationships between our blocks.
Let’s right click on our ‘Security System’ block, ‘Create Diagram’, and ‘SysML Block Definition Diagram’.
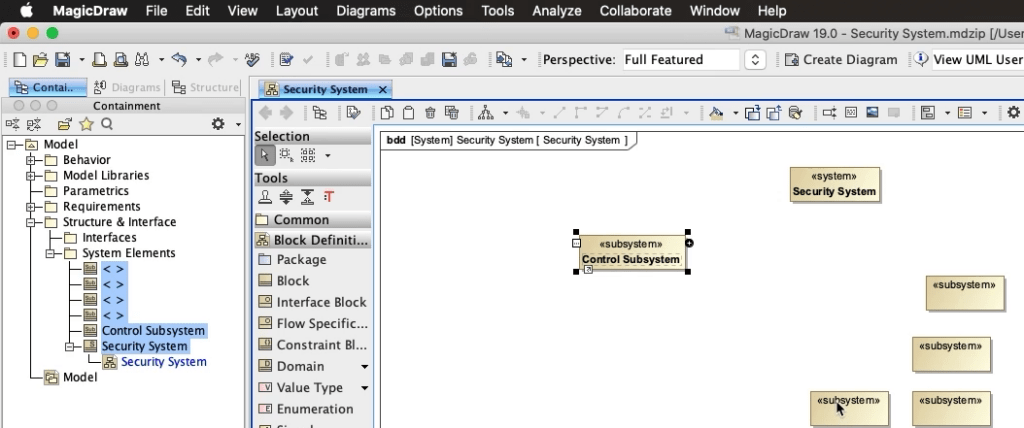
Ok now let’s grab our system and subsystem blocks and pull them over onto our newly created diagram.
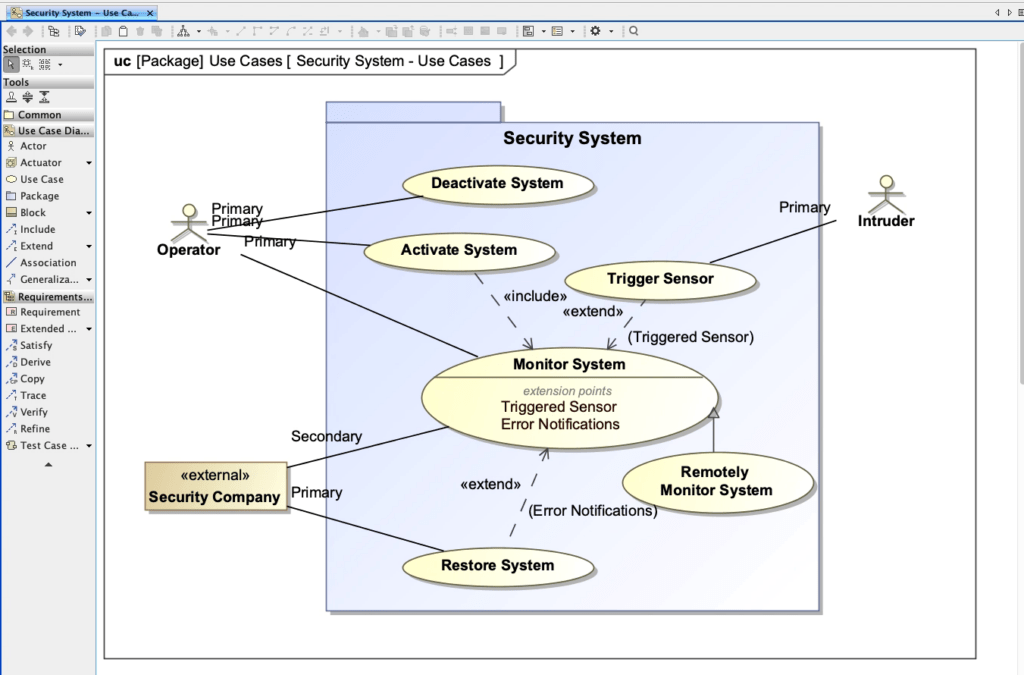
From our previous Use Case analysis we came up with a few Use Cases that can help with determining what some of our subsystems should be.
We had Activate System, Deactiviate System, Monitor System, Restore System, Remotely Monitor System, and Trigger Sensor.
In order to Activate and Deactivate the Security System, we will need a subsystem that provides a way to set those controls. So we will create a ‘Control Subsystem’.
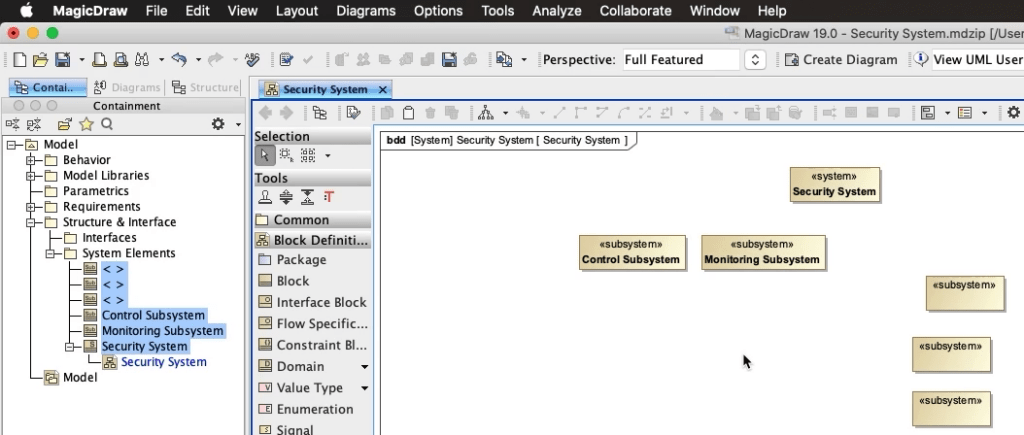
Since we also identified Use Cases for Monitoring, Remotely Monitoring and Trigger Sensors; we will also need a ‘Monitoring Subsystem’.
So both these subsystems will most likely require a power source in order to operate.
Although we didn’t capture a Use Case for power, we can still make the logical leap and include a ‘Power Subsystem’.
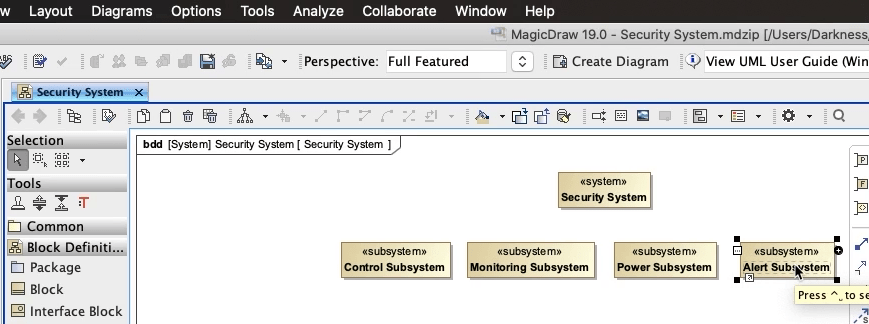
Our ‘Trigger Sensor’ Use Case is sending an alert to our ‘Monitor’ Use Case. So we will need a mechanism to satisfy this.
Let’s also create an ‘Alert Subsystem’.
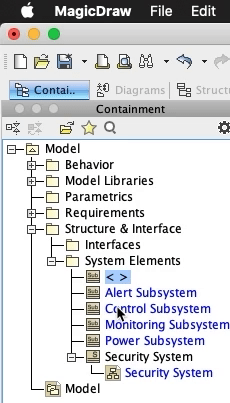
Removing Model Elements
Looks like we won’t be needing this extra subsystem block here.
So let’s delete it from our diagram and since we most likely won’t need it in the rest our model, we can also delete it in our ‘Containment Tree’.
The subsystem is now permanently removed from the model.
Composition Relationships
Now that we’ve created these subsystems, how do we show that the ‘Security System’ requires these subsystems in order to function.
We can do this by creating Compositional relationships between the ‘Security System’ and each subsystem.
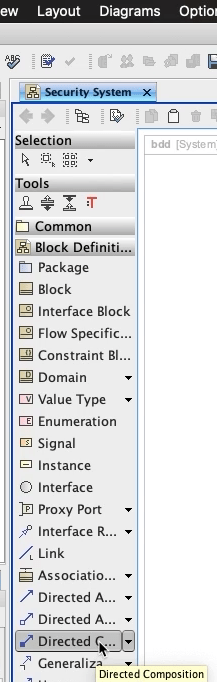
Let’s click on ‘Directed Compositional’ relationship in our toolbar here.
Select the ‘Security System’ block as our parent and then select the ‘Control Subsystem’ block to finish creating the relationship.

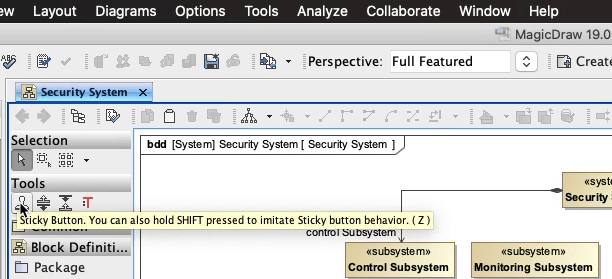
Recall from our Use Cases development that we used the ‘Sticky Button’ to create multiple relationships. We’ll do the same thing here. And then hit the ‘Escape’ button on our keyboard to finish.